Showing posts with label Crafts. Show all posts

DIY Fall Family Tree

I LOOOOVE fall. The trees are GORGEOUS this year! They seem especially gorgeous because last year there was a very early frost and the leaves just fell off without turning colors. So I'm loving God's beautiful fall paintings this year!

My family decided to make something else this year and it was so much fun and very easy to do too! I found this on Pinterest. (Yup, SOOOO addicted!)


If you go here you will be taken to the site where you can download a beautiful picture of a painted tree for FREE!!! Can't beat that! They suggest using it for a wedding "guest book" and I think that is a fantastic idea. 
But I'm already married so not using that one! But what I CAN do is use it as a unique family tree! So I did. 

http://styleunveiled.com

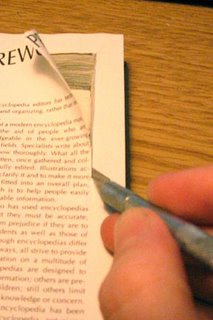
I opened the image with Word (or you could use Picnik) and added our family name and the year.
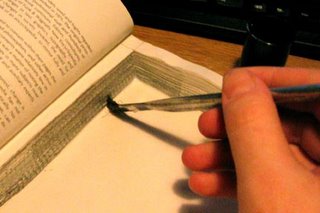
I printed it out on cardstock and gathered my ink pads in Red, Orange, Gold, and Yellow. 

I gathered my clan together and we had a fingerprinting party. Each person got their very own fall leaf color and we put leaves on the tree! In the center of the tree the branches form a heart and my hubbie and I put our fingerprints there in the middle. It's not done this way in the picture yet in case you noticed but I wrote (very tiny) each person's name in one single appropriate fingerprint randomly. It turned our beautifully! I love it and will cherish it forever. 


Here is our very own family tree! I love it and I think we will probably do it every year - I saved the image of the tree on my computer in case they stop offering the free download. 

In HIS Grip, 
               
I'm linked up with: 
DIY under $5

Trash to School Desk!

I wanted school desks. I had no school desks. I had a table and that was fine but they weren't school desks. So I found some! I found two small tables that were left in the parsonage. I ALMOST threw them away but found random places to stick them so they would be useful. I'm SOOO glad I kept them!
BEFORE!!! 
They had been painted quite a lot so I did some research about paint stripping and it seemed to not be too daunting so I tackled them with paint stripper.
I slapped the stuff on and watched it do this! I was impressed - this should be easy! 
HA HA HA!!! Let me tell you - this was NOT easy! I scraped it off and it wasn't coming off. This stuff was ridiculous! After slathering on 3 layers of paint stripper and 4 chemical burns - this stuff eats through plastic gloves! I gave up and called a friend with a sander. I sanded that puppy down. Why I did not do that in the first place - heaven knows. God probably decided He would teach me a thing or two about patience and persistence. I don't think I got the persistence lesson though. To all who consider using paint stripper - think again and you will be glad you did. 
Here it is after being sanded (see the paint is STILL not all the way off!) and I started priming. 
AFTER! 
Here is the finished project! I was pretty pleased with how it came out and now it is no longer a trash possibility but it can be used for a desk for my schoolroom or if I find actual desks, I have a spot picked out in my hallway for this small table! 
post signature

This post is linked up with:


Domestically Speaking  DIY under $5   

DIY 0.99 Cent Pack of LOVE!

Hannah and Ann! 
My wonderfully wonderful friend Hannah has been laid up after having surgery and what does she do? She writes a guest post for my blog! I love that girl! Just so you could get a crystal clear picture of what kind of friend Hannah and I are - here we are. Jumping on a bed. In a hotel. It. was. HILARIOUS! So now that we have THAT established! Here is what she did for her sweetheart while all laid up! 

I did something AWESOME today for my hubby - and it only cost me 99 cents! Since my husband travels A LOT and is usually REALLY tired, he chews gum to keep him awake. I noticed when we were driving the other day he chewed his last piece of gum. I decided to do something to show my husband that I love him, and am praying for him when he is away. And of course, to show that you can do something significant for your spouse without spending a lot of money - in this case 99 cents for a pack of gum!
Supplies:  Pack of gum (I used Trident), scissors, an exacto knife or box cutter, markers, card stock, a pen or pencil to trace, and glue or double stick tape.


Step 1:  Take the paper packaging off the foil of the gum. Trace this onto your card stock. Be sure to also trace and cut out the lip that the flap goes into to "close" the gum.


Step 2:  Line up the paper packaging from the gum with your cut out card stock and fold together where the packaging folds. Make sure to crease your card stock.


Step 3:  Decorate your card stock (make sure that you write the correct way! The first time I did this, my words were upside down when I put it on the gum. :)


Step 4:  Glue or tape your card stock onto the foil of the gum package.


Voila! A personalized package of gum! You can also do this for party favors, or a women's event at church. One other thought I had was instead of Trident do Trinity - Cleans and Protects the Heart.


Thanks Hannah for your creativity! AND your very special friendship! I wouldn't know what to do without our occasional insane moments! 
post signature

I'm linked up with these AMAZING ladies at:
DIY under $5     

Freezer Paper Stenciling

So I tried a new project! I'm pretty excited about this too! I tried freezer paper stenciling! First I bought a T-shirt and freezer paper - which came in a HUGE box - I've got enough to stencil THOUSANDS of T-shirts! ha ha! It was $5.77 and I bought some paintbrushes - which I had to laugh at myself because if you read this post where I painted the castle, I just used what I had which was a pretty poor selection! But now I have tons of paintbrushes which cost about $5.50. If I had figured out doing these projects in such close proximity to each other I could have used NICE paintbrushes for both projects but alas! I was not that organized! GASP!

Anywho. . .

I already had fabric paint, an exacto knife, cutting board and an iron so I was set to go! First I printed out my design on regular computer paper. Then I put it underneath a piece of Freezer paper and cut out the design using the knife. This was the most challenging of the whole project but it still only took about 15 minutes to do.


Then I trucked on down to my ironing board and cool! It sealed right to the shirt! It was really neat!


Make sure to keep the inside pieces of your design! Iron them on separately so you get them positioned just right!


After I got it sealed I painted fabric paint across the stencil. I used strokes starting on the paper and moving onto the shirt so paint wouldn't loosen the seal or get under the paper. I had no real trouble with it though! Unfortunately this is where the pictures stop! I forgot to take a picture of the finished project because I already gave it to Nana for Mother's Day! Bummer! But I have to tell you that it looked amazing! My hubbie said that it looks as though I bought it that way! Yay! Can't beat that! If you want to see a video of how to do it or more pictures of finished freezer paper stenciling check out this blog! Soo. . . all in all the project cost me almost $17 (Yikes!) BUT!!! If I ever want to do it again, which I DO!!! All I will need to do is buy the shirt! Or do a shirt I already own. . . Hmmm. . . that's a cool idea! Let me know if you have done this before and what you made or if you're going to go buy a mega roll of freezer paper too!
post signature
This blog is linked up with. . .

          Raising Homemakers

Valentine's Day Wreath Craft Project


I've been trying to expand my holiday decorations and I saw several ideas but I didn't have any of the materials for them. So I came up with my own idea after seeing how other people were creating theirs! I actually made this with my Mother-in-law in mind because she LOVES to decorate for the different holidays and her birthday is today so I made it and sent it to her yesterday. It probably only took me about an hour and a half to make it - maybe less, I was interrupted a LOT! 

First I cut out a heart shape form using newspaper as a pattern to follow - I drew it on the fold so the two sides of the heart would be the same. I just eyed it - it's probably 12 inches by 15 inches or so. Then I cut it out of a cardboard box and glued them together to make a firm base.

Then I cut strips of pink fabric and hot glued it around the base to make a background for my hearts. I made the nicest looking side the back. 

Then I used the large conversation hearts and went to town just gluing and gluing wherever and however. 

I used a pink ribbon and made a cheater bow. I looped the larger circle inside the small circle then hot-glued them so they would stay.  


Then I hot glued 3 ribbons on the back that held 3 individual hearts to hang down on the inside. I hot glued a hanging ribbon and used a thumbtack to secure it better. I tried a stapler but it wasn't working very well. Then I was done! This would be good for hanging on an outside door that is protected by a screen door or something. I wouldn't recommend letting it get wet. :0) 

I sent this one to my MIL but I'll definitely be making another one for myself. Especially since I bought 3 big bags of hearts and I only used 1! Let me know if you use my idea to make one for yourself! 

UPDATE - As you can see, I hung mine on my front door and the sun faded it TERRIBLY! It is now a very very pastel colored and no longer the bright happy colors. It still looks pretty but you will want to hang this in a place where the sun does not shine! 

post signature

DIY Dollhouse! Day 1

I am SUPER excited about this project I just have to post about it! My Aimee-girl is a total girlie girl who loves princesses, pink and babies (otherwise known as Barbies and other dolls). Sam and I really really wanted to get her a dollhouse but as you know, 2 years without a steady income does not allow for the $200 needed to buy a dollhouse like we wanted to get for her. SOOOOOO . . .

We're MAKING ONE!!!! WAAHOOO!!!

Just so you know, we are NOT builder people. We do not even OWN a saw. We do not OWN a sander. Our power drill that we DO own is one that does not hold a charge so we plug in the charger for 3 hours, use it for 10 minutes and then put it back in the charger. hee hee. As I said, we do NOT build things. So we're not building things. We are improvising! But we DID use our drill! And my hubbie did very well with it too!

First of all we are using a bookcase that was basically an ugly thing used to hold BOOKS. Hence why we have it! We aren't builders, we are studiers! Hence if a bookcase is out there for the taking, we take it! So I had the brilliant idea of making this four shelf bookcase into a dollhouse for Aimee.

Our bookcase has a shelf depth of six inches and the shelves are about 9 inches apart. Sam took a 1x4 over to my parents house (Who are builder-type people) and we had the board cut to make the room partitions. Then we figured out what rooms we wanted and where to put the dividers. We made the partitions smaller than the shelves so we do not have to cut doors into the partitions.

Here is my wonderful hubbie screwing in the room dividers.


Beautiful Bookcase huh? I told you it was ugly! 


but here it is after a fresh coat of paint!


And here it is with the second coat of paint and our plan of the rooms! 
So far money spent $0!!!! 

Stay tuned for tomorrow's post as we pick out wallpaper (scrapbooking paper) and flooring for this little abode! 

Update: 

post signature

Homemade Christmas Presents Part 2 - Hollow Book

Making Christmas presents for this year is going well but as I said in the first part of this series, what I'm making is staying a secret until AFTER I give them to their respective owners! We would not want to spoil the surprise! This is a gift that I gave to the men in my life and I was actually surprised at how much they liked them! First of all I went shopping at Goodwill and other thrift stores for used hardback books. I chose books related to the recipients for example I chose books with titles about family for my dads and a Star Wars book for one of my brothers and "Treasure Island" for another one of my brothers. It's really fun to find books with titles about secrets or treasures or money because that's what these books are for! 

You will need: 
a HARDBACK Book that you are willing to not read anymore and at least an inch thick.
Glue
Water
Paintbrush
X-acto knife
pencil
Ruler or straight edge


First mix one part glue to one part water and mix well with a paintbrush. Decide where in the book you want to have the opening in your book begin. I liked to separate a few pages so you could not tell right away that there is a secret compartment inside. After you decide where in the book you want to start cutting, turn two pages and that's where you will start gluing. Clip the loose pages back and pull the book open. Using the paintbrush start gluing the sides of the pages holding the stack of the pages together firmly. You may need to glue the back to the pages but sometimes this in not necessary. After using plenty of glue on the pages of the book, go ahead and close the book (this is really necessary to close it to dry otherwise your book will dry in a funny shape and you won't be able to close it) which will allow one of the pages you wanted to cut to rest against the gluey pages. Allow to dry under a weight (I used other books). It really only takes a couple of hours to dry if that. When it is dry, see if there are any separations in the pages and glue those back down so the end result is a few pages loose in the front of the book, and a solid clump of pages attached to the back of the book. 


Still keeping the other page that you wanted to cut separated with the other loose pages, mark the top glued page with the opening at least a half-inch away from the edges of the book. Then it's time to cut! Using your knife try to cut as cleanly and as vertically as possible. For all of the books that I made, this was the hardest to do especially if the pages were very thin or if the book was really large. So keep that in mind when choosing books! Each book probably took me about 2 hours to cut so it was pretty painstaking work but I just popped in movies to help the time fly. 

You can stop whenever you want to. I usually went to the very back of the book but sometimes I would keep pages on the inside of the hole. Or I would put an illustrated picture from the book that I had cut out and glued into the hole. After the cutting, make sure you remove all of the little scraps of paper. Now it's time to glue the inside edges of the pages. Make sure you don't have any major drips! After gluing the pages, glue the top page and take your remaining page that you wanted to cut and glue it down on top of your cut pages. Now close the book again and let it dry under weights again. 

Now open the book up again and cut the page that covers the opening. the reason for doing this is to even up the hole edges because that top page will get pretty scuffed up and marked up so it makes a pretty edge. Check to see if it still needs to dry and leave the book open at this point to let it dry. Then you can store or stash whatever you want to in there! For my dads, I put a picture of him with his grandkids glued to the inside so they could open it like a picture frame. You could actually make two holes - one for each picture on either side of the book and instead of bracing it closed to dry you could prop it open so it would stand open like a picture frame. If your book refuses to stay shut hot glue a ribbon to the sides of the book and tie it shut. The only problem with doing that is it makes it obvious that it's not a normal book. I got this idea from a friend of mine who gave me one of these as a gift and I found this site which also gives directions on how to do it. I made homemade taffy to put inside the books for Christmas but you could put anything in there to give them away! Are you making anything for Christmas presents? If so please share! :-) 

Homemade Christmas Presents Part 1 - Dried Fruit Wreath

Guess what! Christmas is only 3 months away! For me, that means i need to start figuring out what to make for Christmas presents for my family and friends! Financially we're unable to purchase gifts that would be truly appreciated so we just put some ingenuity and a lot of love and work into our presents instead! Here is what I made for my mothers last year. I went to several thrift and goodwill stores and picked up some of these for about $1.00 each.
FloraCraft Straw Wreath 12" Clear Wrap

New they are about $3.00 so it's still a good purchase if you can't find them at Goodwill. Then I got oranges and apples (we received 2 fruit baskets as presents and we don't go through fruit very quickly - so it was perfect!). I probably used a bag of apples and a bag of oranges to make 2 wreaths. This also works great on apples and oranges that are just about to go bad because you're not going to eat them anyway!
Thumbnail
I got cinnamon sticks (which I had bought in bulk at an Amish store so I already had tons!) 
and dried bay leaves (which I already had enough to last me all of eternity!)
and another purchase was a bag of raffia ($1.00 at my Dollar store) 

Make sure you use some raffia and attach a hanger on the back of your wreath before you start adding fruit. 

I sliced all of my oranges and apples (don't remove the seeds and cut so you can see the stars in the apple slices) about 1/4 inch if thinner it's ok just go ahead and use them - making them different widths and sizes add to the wreath. Then I threw them in my dehydrator over night. Remember you are not eating these so the firmer they are the less chance of mold later. However, I tried to dry the oranges longer to make them not sticky and they ended being as hard as frisbees and were more difficult to mold to the shape of the wreath and were still sticky so don't worry about the stickiness - if they've been drying for 8 hours or so they'll be fine.


in the morning I had this! 


and this


then I used my handy dandy glue gun and went to town on my wreath! 

I just used a little creativity to obtain the look I wanted and randomly glued the pieces all over the form of the wreath (leaving the back bare) After the fruit was glued down I added the cinnamon sticks in random places 


and the bay leaves went underneath the raffia bow. 


I wish I had pictures of the process but I wasn't blogging or recording my life in pictures so all I have is the finished product which has hung on my front door for the last year. The fruit has changed colors as you can see - the oranges were a beautiful orange color and now are a really dark brown and the apples were white and turned pink for a little while and now they too are brown. However, I still love the look so I think it will last forever! If you wanted to you could spray it with a sealer but it smells so amazing for several months that I didn't want to ruin that! I kept it inside for quite a while until the scent was gone then I put it on my front door which is where it changed colors so keep that in mind. If you're going to store it away make sure it is in a VERY dry place and loosely wrapped or it will mold - it is still food!